If you were initially unsuccessful in setting up wireless scanning with the MX340, then you may have figured out that you can also scan to a USB drive that you insert into the USB port on the printer. However, this can be tedious, and requires you to have a USB drive available. Fortunately network scanning with the MX340 on your Windows 7 computer requires only a few short steps.
Wireless Network Scanning with the Canon Pixma MX340
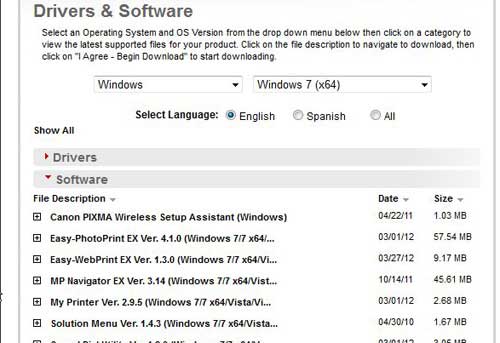
The biggest problem that most MX340 users encounter when scanning with their printer is that the program you need to use to scan is not included as part of the regular installation file. The program that you need to use is called Canon MP Navigator, and it is available from this link on Canon’s website. Click the drop-down menu in the Drivers & Software section that says Select Operating System, then click the Select OS Version drop-down menu and select the version of the operating system that is installed on your computer. In the image below, I have selected Windows and Windows 7 (x64), respectively. You will then need to click the gray Software link, then the MP Navigator EX Ver. 3.14 link.
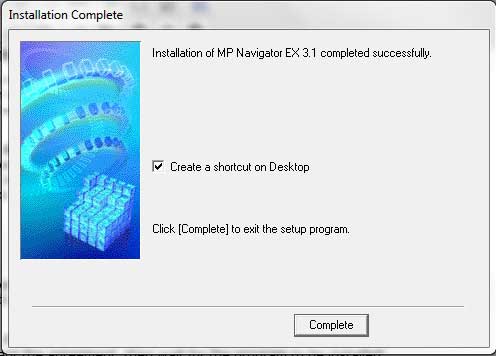
Click the I Agree – Begin Download button to download the MP Navigator installation file to your computer. Once the program has finished downloading, double-click the downloaded file to begin the installation. Click the Next button on the first screen, then select your geographical region and click the Next button again. Click the Yes button to accept the agreement, then wait for the program to be installed. Click the Complete button once the installation has finished. Depending upon the configuration of your network and how you initially installed the MX340 printer, you may also have to select your printer during the installation process.
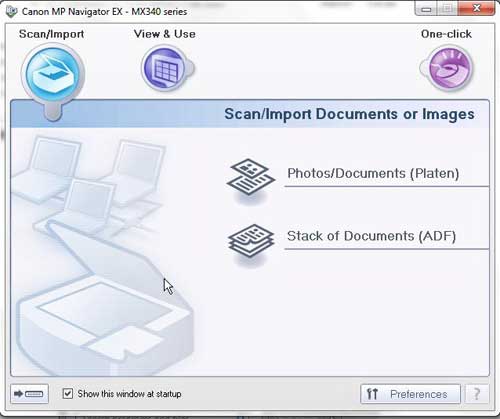
Click the Start button at the bottom-left corner of your computer screen, click All Programs, then click the Canon Utilities folder. Click the Canon Mp Navigator EX 3.1 folder, then click the MP Navigator EX 3.1 option inside the folder to launch the MX340 scanning utility. This will open the MP Navigator scanning program, which features a home screen like the image below. You can begin the process of scanning to your computer by clicking the Photos/Documents option at the center of the window. If you want to scan more than one document at once, you could also load a stack of documents into the document feeder on the top of the printer, then click the Stack of Documents option on this screen instead.
You can specify the settings for your scans by clicking the Specify button at the left side of the window, then click the green Scan button to wirelessly scan the document(s) from the MX340 to your computer. After receiving his Bachelor’s and Master’s degrees in Computer Science he spent several years working in IT management for small businesses. However, he now works full time writing content online and creating websites. His main writing topics include iPhones, Microsoft Office, Google Apps, Android, and Photoshop, but he has also written about many other tech topics as well. Read his full bio here.
You may opt out at any time. Read our Privacy Policy


