If you have connected your flash drive to one of these devices and discovered that it cannot be read, then you will need to format the flash drive to the correct format. The tutorial in this article will show you how to format a flash drive so that it is in the FAT32 format.
Formatting a USB Flash Drive to FAT32
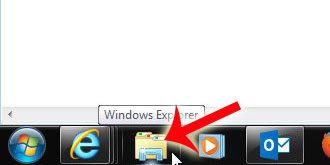
Note that formatting a flash drive is going to delete all of the data from the flash drive. If you have files on the flash drive that you need to keep, then you should copy them to your computer’s hard drive before following the steps in this article. Step 1: Insert your USB flash drive into a USB port on your computer. You can close any AutoPlay dialog windows that open. Step 2: Click the Windows Explorer icon in the taskbar at the bottom of your screen.
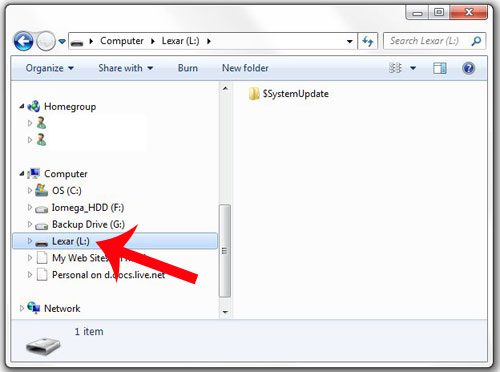
Step 3: Click the USB flash drive in the column at the left side of the window to select it.
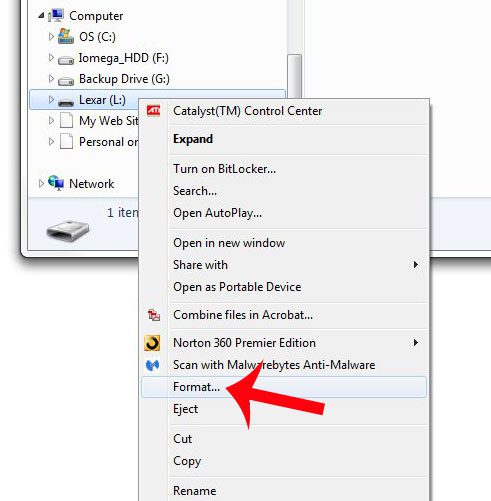
Step 4: Right-click the selected USB flash drive, then click the Format option.
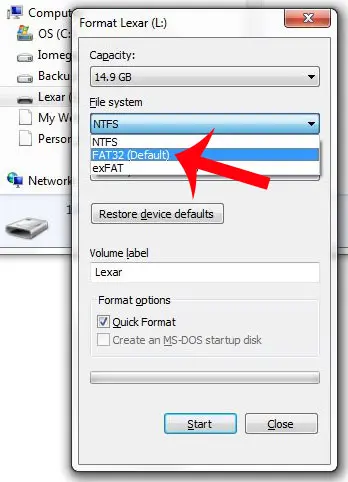
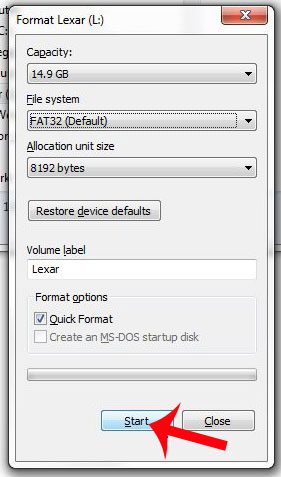
Step 5: Click the drop-down menu under File System, then click the FAT32 option.
Step 6: Click the Start button at the bottom of the window.
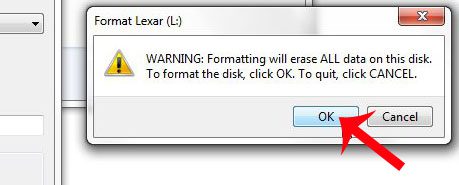
Step 7: Click the OK button to confirm that you are aware that formatting the USB flash drive will delete all of the data that is currently stored on it.
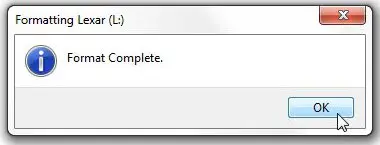
Step 8: Click the OK button on the pop-up window after Windows informs you that the format is complete.
Are you running out of space on your flash drive, and need to get rid of some files? This article will teach you how to delete files on your flash drive. After receiving his Bachelor’s and Master’s degrees in Computer Science he spent several years working in IT management for small businesses. However, he now works full time writing content online and creating websites. His main writing topics include iPhones, Microsoft Office, Google Apps, Android, and Photoshop, but he has also written about many other tech topics as well. Read his full bio here.
You may opt out at any time. Read our Privacy Policy
